Top Picks

The 30-Second Answer (For the Beautifully Impatient)
> Wash. Prime. Basecoat the biggest areas. Layer mid-tones. Wash the recesses with shade. Drybrush the highlights. > > That's the entire workflow in one breath. Everything else in this guide is the hard-won wisdom I wish someone had handed me before I ruined my first batch of Zombicide survivors with way-too-thick craft paint.
I've been painting minis for about five years now — mostly for Gloomhaven, D&D, and Marvel Champions. I'm not a Golden Demon contender. I'm just a guy with a desk lamp, a folding table, and roughly 340 painted figures worth of glorious, paint-splattered mistakes behind me.
Finding the right how to paint board game miniatures comes down to matching watt-hours to your actual power needs.
This guide skips the gatekeeping. No airbrushes. No $400 light boxes. No "non-metallic metal" lectures. Just the three techniques that take a grey plastic blob and turn it into something your game group audibly gasps at.
| Stat | The Reality |
|---|---|
| $60 | Total cost of the starter kit you actually need |
| 3 | Core techniques that do 90% of the work |
| 340+ | Minis I've personally painted (and ruined, and rescued) |
| 0 | Artistic talent required to get started |
| 1 weekend | Time from "never held a brush" to finished squad |
Featured recommendations from our review database — direct Amazon links below.

Why Unpainted Minis Feel Like a Letdown
You crack open a brand-new board game. The art is stunning. The cards feel like silk. The insert is custom-molded. And then you spill out the miniatures and they're...
- A sad shade of grey plastic
- Or beige resin that looks like a granola bar
- Or that weird translucent green that looks like alien gelatin
Painted minis change everything.
> The first time I set down my painted Pandemic pawns (yes, I painted the little wooden pawns too), my group actually gasped. One friend picked up the red researcher and just stared at her for thirty seconds. Painting minis isn't decoration — it's storytelling on a table.
The barrier most beginners hit is the lie that says "you need to be an artist." You don't. You need three techniques and about $60 in supplies. That's it. That's the whole secret.
> PAINTER'S TRUTH BOMB: The gap between a "grey plastic mob" and a "holy crap, did you paint these?" reaction is exactly one weekend of effort. Not talent. Not money. Effort.
Watch This First: A Painter's Mindset for Beginners
Before you even crack open a paint pot, this primer will save you weeks of confusion. It's the kind of video I wish I'd watched back in 2021 when I was butchering my first warband with hobby-store craft paint and a brush from a kid's art kit.
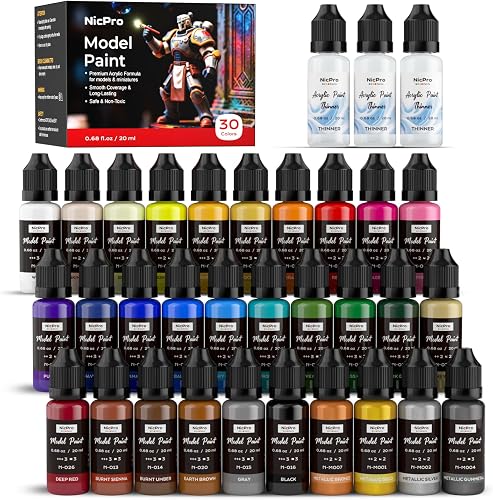
The Starter Kit: Exactly What You Need (And Nothing You Don't)
After testing dozens of products and watching shelves of "essentials" gather dust, here is the bare-bones, no-regrets starter kit. Buy this, ignore everything else, and you'll be painting tonight.
| Item | Why You Need It | Approx. Cost |
|---|---|---|
| Acrylic paint set (Vallejo or Citadel) | Thin, pigmented, made for plastic | $30–$50 |
| Synthetic brush set (sizes 0, 1, 2) | Control for details and basecoats | $15 |
| Grey or black primer spray | Paint won't stick to bare plastic | $10 |
| Wet palette | Keeps paint workable for hours | $15 |
| Citadel Shade (Nuln Oil or Agrax Earthshade) | The single most magical bottle in this hobby | $8 |
| Cheap kitchen sponge + paper towels | Drybrushing & brush-cleaning lifesavers | $2 |
> MARCUS'S MONEY-SAVER: Skip the "100-piece artist kit" on Amazon. Those brushes shed bristles into your basecoat and the paints are chalky. Buy hobby-grade or don't buy at all — your future self will thank you.
The Three Techniques That Do 90% of the Work
Forget edge highlighting. Forget glazing. Forget object-source lighting. Master these three, in this order, and every figure you paint will look ten times better than the box art promises.
1. Priming — The Step Everyone Skips (And Regrets)
Bare plastic is slick. Paint slides off it like butter off a hot pan. Primer is the grippy handshake between your mini and every color you'll ever lay down.
- Grey primer = forgiving, natural, great for beginners
- Black primer = moody, dramatic, hides mistakes in recesses
- White primer = vibrant final colors, but unforgiving of thin coats
2. Basecoating — Block In the Big Shapes
This is where beginners panic. Don't. Treat your mini like a coloring book. Skin goes here. Cloak goes there. Boots are brown. Sword is silver. That's it. Don't worry about shadows, highlights, or blending yet — just get every surface covered in its "local color."
> THE GOLDEN RULE: Thin your paints. Two thin coats always beats one thick one. Thick paint clogs detail and turns sharp sculpts into melted candle wax.
3. Shading + Drybrushing — The One-Two Punch That Sells the Illusion
 This combo is the secret handshake of the miniature painting world.
- Shade (wash): Slop a dark, watery wash (Nuln Oil for cool tones, Agrax Earthshade for warm) over the whole figure. It pools in the recesses, creating instant shadows.
- Drybrush: Dip a stiff brush in a lighter color, wipe 95% of it off on a paper towel, then lightly skim the brush across raised surfaces. Edges, knuckles, chainmail, hair — they all light up.
See the Full Workflow in Action
Reading is one thing. Watching a brush actually hit plastic is another. This walkthrough shows the entire prime-basecoat-shade-drybrush pipeline on a single board-game mini from start to finish.
The 5 Mistakes That Murdered My First Minis
Learn from my pain. Every one of these cost me a figure I had to strip in Simple Green and start over.
- Thick paint. I used craft paint straight from the bottle. It looked like frosting. Detail: erased.
- No primer. I skipped it to "save time." Paint chipped off in the box on the drive home.
- Brush too big. I tried to paint a goblin's eye with a size 4. Predictable disaster.
- No water. Dry brushes drag pigment in clumps. Keep a cup of water within reach at all times.
- Trying to be perfect. Tabletop standard is the goal. Three feet away, on a game board, nobody sees the flaws.
The "Tabletop Standard" Mindset (And Why It's Liberating)
There are two kinds of painters on the internet:
- The showcase painters posting eye-watering, 40-hour single-figure masterpieces on Instagram.
- The tabletop painters cranking out an entire Gloomhaven box of 47 minis in a month.
Your First-Weekend Action Plan
| Day | What You Do | Time Required |
|---|---|---|
| Friday night | Order the starter kit. Watch the videos above. | 30 min |
| Saturday morning | Prime 5–10 minis in the garage or backyard. | 45 min |
| Saturday afternoon | Basecoat every figure. Don't overthink colors. | 2–3 hours |
| Sunday morning | Wash everything with shade. Let it dry fully. | 1 hour |
| Sunday afternoon | Drybrush highlights. Base the figures. Show off. | 2 hours |
By Sunday night, you'll have a painted squad on your shelf, a new obsession in your life, and a Monday-morning text thread of friends asking "wait, you painted those??"
Final Word: Just Start
The single biggest barrier between you and a shelf full of painted minis isn't skill, money, or time. It's the first brushstroke. Pick the ugliest, cheapest figure in your collection. Prime it. Slap some paint on it. Make it look bad. Then make the next one look slightly less bad.
Five years and 340 minis later, I can promise you this: you'll never regret starting. You'll only regret how long you waited.
Now go thin your paints.
— Marcus
Related Reviews
Key Takeaways
- Choosing the right how to paint board game miniatures means matching capacity and output ports to your actual devices
- Always check actual watt-hours (Wh), not just watts — runtime depends on Wh, not peak output
- Also covers: miniature painting supplies
- Also covers: best paints for tabletop minis
- Also covers: beginner mini painting tips
- Compare price-per-Wh across models to find the best value for your budget